Uploading Files to a Workspace
Step 1: Download the files as instructed by the teacher in whatever course you’re currently on. Usually, these files are located in the Project Files/Zip File found on the video page you’re currently on, beneath the Downloads text.

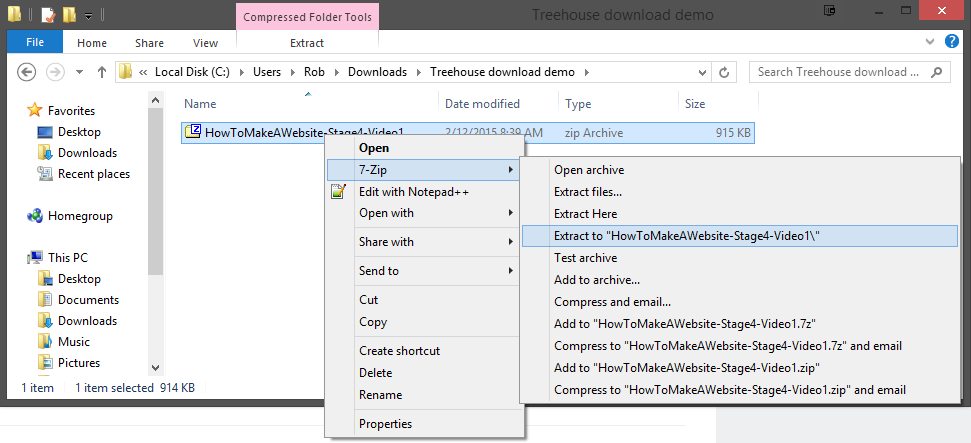
Step 2: Now that you’ve downloaded the Project File.zip, you’ll need to be able to properly open it. We do that by using an extraction tool to ‘unzip’ them. If you are unsure if you have an extraction tool or not, download the tool called 7-Zip from http://www.7-zip.org/download.html
Now that you have your extraction tool downloaded and installed, navigate to where your Project File.zip is located, right click on it and select 7-zip from the menu that appears (or whatever extraction tool you use) and then select the option that says something along the lines of Extract to “whatever-the-file-name-is-called”
Step 3: You should now have two folders, one still being compressed (zipped) and the other now decompressed (unzipped). Go ahead and click on the unzipped folder to safely access the contents within it.

Step 4: You can now begin moving your files within the unzipped folder to your Workspace. Do this by selecting the files you desire (in my example below, I’m just moving over the image files found in the ‘img’ folder of the Project File I downloaded) and then dragging and dropping them into the bottom left hand corner of your Workspace

If you’ve done everything properly, your files should have successfully uploaded into your Workspace where you can then move them into their desired folders within your workspace. We hope this guide has helped!